Process Overview
Adopting the latest Technology for Efficient and Reliable Manufacturing
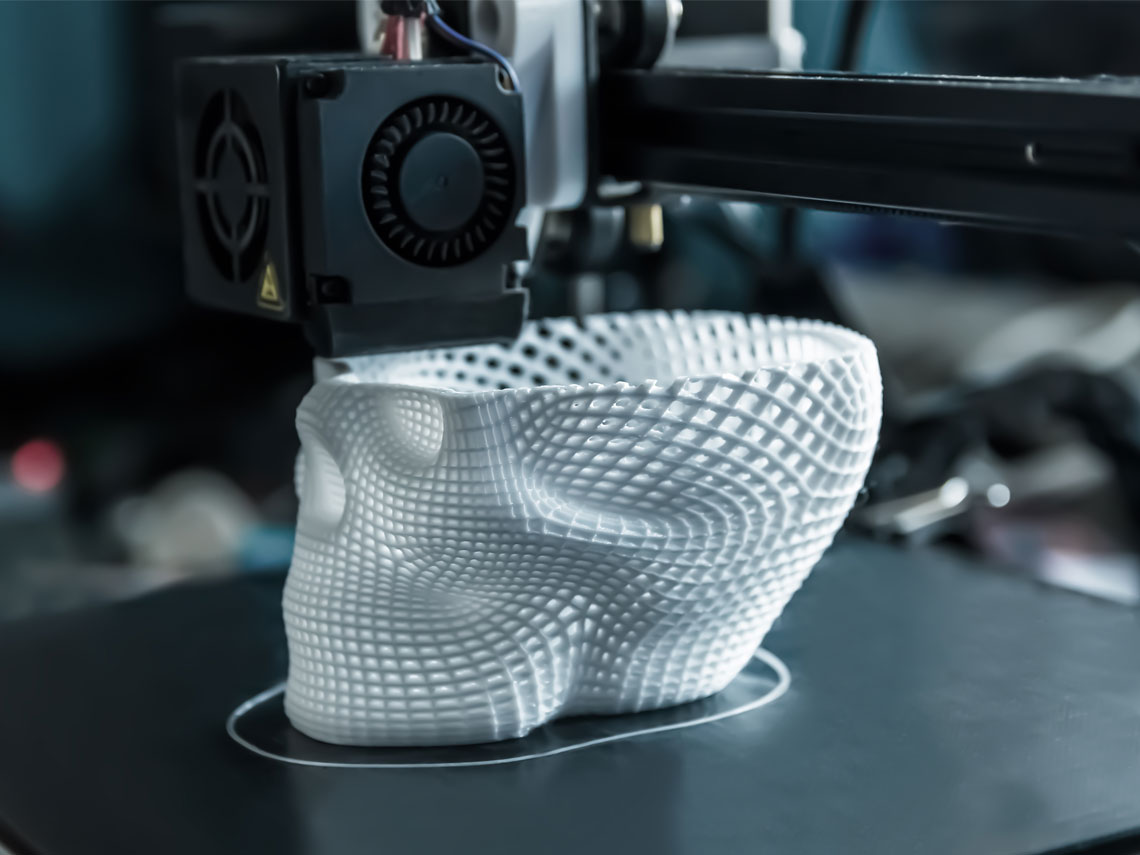
Also called as Additive Manufacturing, it is a process where part geometry is grown by depositing and fusing multiple layers one after the other. The part is manufactured as per the 3D CAD model and fed into its computing system. 3D printing can be classified into different types based on the type of material used for manufacturing.
- SLS (Selective Laser Sintering) – This 3D printing technology makes use of CO2 laser to fuse fine particles of thermoplastic powder to build part geometries. Parts made from this process do not require any post processing and hence can be directly taken up for end use. Parts made are highly accurate and durable but preferred for low volume production.
- FDM (Fused Deposition Modelling) – In this method the feedstock is introduced into the system via an extruder which regulates the feed movement of the polymer to the heater where it melts. This molten polymer is extruded through a nozzle and deposited onto the print bed also called as build platform. The extruder, heater and nozzle are all contained in a print head. This process is known for its speed, accuracy, and competitive cost.
- SLA (Stereolithography) – It is an additive manufacturing process that uses UV light on a liquid polymer resin to selectively solidify the part geometry layer by layer. After the printing is complete the parts are washed in a solvent solution to remove uncured resin and kept in a UV light oven for final curing. SLA printed parts have fine detailing and surface finish.
- Polyjet – In this process a UV curable resin is jetted onto a build platform in ultra-thin layers along with a gel like support material. The build platform moves downwards as each layer is cured by UV light and the process is repeated. The support material is removed by water jetting and the parts can be used immediately after curing. It can be used to make parts of different materials, colors, and transparencies in a single build with high accuracy, speed and fine details.
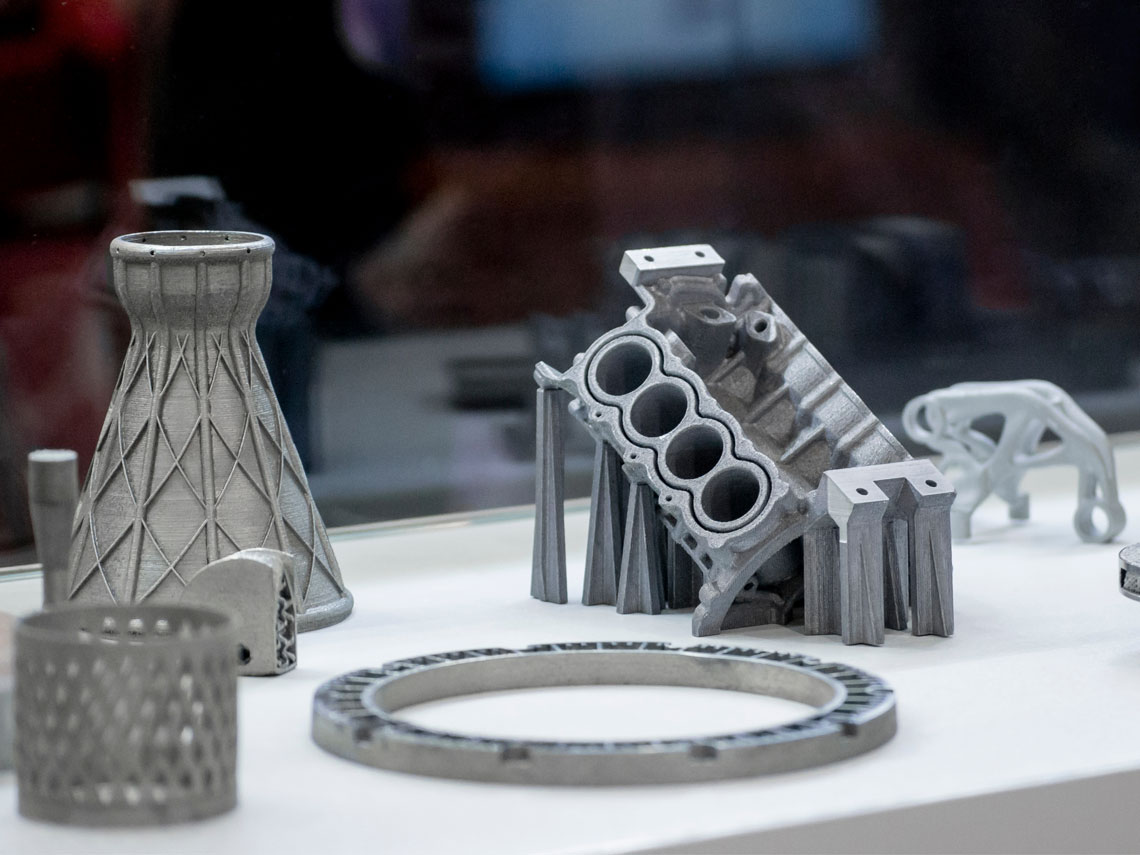
- DMLS (Direct Metal Laser Sintering) – This process is most ideal for 3D printing of metals as it uses heat of a laser to fuse metal particles together in subsequent layers. The laser is guided along the scanning bed as per the 3D CAD model. Once the printing is complete the excess powder is removed, and the part is heat treated to remove residual stresses. It can be used to make metal parts with complex geometries and intricate shapes.
- Metal Binder Jetting – In this process the metal powder is first fused together with a binding agent. Once the part is bound the resultant shape is called a green part and is left to cure which is then put in a furnace for sintering. These parts are prone to shrinkage and are slightly porous.
Materials
Commodities that we emulsify into Finished product
Selective Laser Sintering
- Nylon PA 6
- Nylon PA 12 (glass filled)
Fused Deposition Modelling
- ASA
- ABS
- PC
Stereolithography
- Accura 25
- Accura 60
- Accura Extreme Grey
Direct Metal Laser Sintering
- Stainless Steel
- Aluminum
- Titanium
Polyjet
- Photopolymer (Rigid) and Photopolymer (Rubber)
Metal Binder Jetting
- Stainless Steel and its variant mixture
Capabilities
A synopsis of our Skills and Expertise
- Rapid prototyping of parts in less than 5 days based on project scope
- Manufacturing of parts for the Healthcare sector such as dental implants, anatomical models, surgical guides, orthotics etc.
- Manufacturing of small and intricate jewelry items
- Wide range of selection of materials as stated above
- Flexibility in selection of process for manufacturing of parts based on material used
- Manufacturing of prototype as well as production parts
Application and Benefits
Gain an Advantage over your Competition

3D printing has rapidly advanced in recent years due to due to its ostentatious offerings and has found extensive applications in Aerospace, Defence, Jewelry, Consumer products, Prototyping etc.
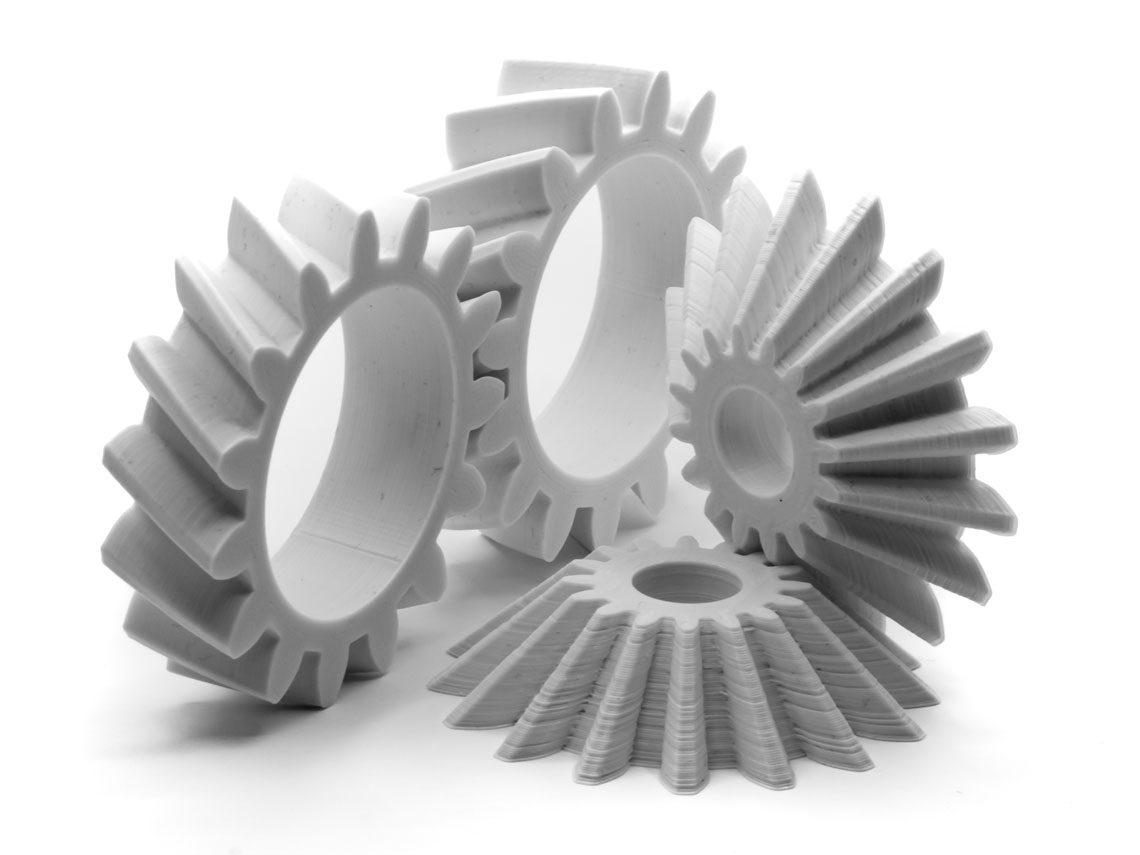
- Complexity – It can easily manufacture complex and intricate shapes and profile
- Flexibility – Different process can be adopted for manufacturing of a part with same material based on its characteristics
- Precision – Parts with narrow dimensional tolerance and high accuracy can be manufactured
- Repeatability – Parts can be made with highest rate of repeatability compared to any alternate manufacturing process
- Material selection – Can be used to make parts from almost any material such as ferrous and non-ferrous alloys, plastics etc.
- Versatility – Almost any part can be manufactured within the limits of the machine size
- Rapid Prototyping – Prototypes can be made in less than 5 days saving huge time and cost
Frequently Asked Questions
Got Questions? We’ve Got Answers!
- 3D printing, also known as Additive Manufacturing (AM), is a process of making a physical object from a three-dimensional digital model, usually by laying down many successive thin layers of a host of different types of material.
- It is useful to architects for creating mockups and to mechanics for creating tools. It is used in media houses for manufacturing personalized promo gadgets. It's also a wonderful tool for start-ups when they need to create prototypes of casing or even the casings themselves in low-volume production.
- Few sectors where 3D printing is being popularly used include medical, architecture, electronics, education, automotive, prototyping, tooling, casting, plastic molding, customized gifting etc.
- 3D printing can be classified into different types based on the type of material used for manufacturing. The various types of 3D printing methods that can be adopted include Selective Laser Sintering (SLS), Fused Deposition Modelling (FDM), Stereolithography (SLA), Carbon Digital Light Synthesis (DLS), Polyjet, Direct Metal Laser Sintering (DMLS), Metal Binder Jetting etc. For more details, please refer the Overview section of this page.
- There are a variety of materials that can be 3D print to different geometries of thermoplastic, thermoset and metals. For more details, please refer the Materials section of this page.
- 3D printing is preferably used for prototyping and new part development due to its ability to print parts with intricate details without the need to invest in dies and tooling’s thereby leading to huge time and cost saving.
- We can print prototype parts in as less as 5 days after design finalization based on the size, geometry, and complexity of the part.
-
3D printing poses a variety of applications and advantages when compared to other conventional machining processes. However, it is not an ideal production process for every situation. Below we have listed a few pros and cons which will enable you to make a judicious decision for your requirement.
-
Pros
- Speed – Unlike conventional manufacturing process, it does not require setup and tooling and hence parts can be made even within a day.
- Flexibility – It is the most suitable process for making parts which has intricate design. This allows the designer to retain critical features without having to compromise on the functionality.
- Rapid Prototyping – Due to better speed and flexibility of the process, it is convenient to quickly make changes in the design for optimization.
- Sustainable – Due to its flexibility for making custom made parts and negligible wastage of input material, the process seems to be more sustainable as compared to traditional manufacturing process.
- Cost effective – It is economical in most cases as there is no setup time, no tooling, minimal finishing requirement, no input raw material wastage and minimal process monitoring.
- Durability – 3D printed parts have high impact strength, average flexibility, and high resistance to environmental factors.
- High precision – The latest advancement in 3D printing technology enables the user to produce parts with high precision and accuracy.
-
Cons
- Uneven surface finish – Since 3D printed parts consist of multiple layers, there might be visible steps on vertical surfaces which is not aesthetically pleasing. To achieve better surface uniformity and appearance, parts must undergo vapor smoothening.
- Limited material selection – 3D printing has fewer material options compared to thousands of material options available in the market for casting, forging and injection molding.
- Size limitation – There can be a constraint in printing extremely small or large sized parts basis the size and selection of the printer.
- 3D printer limitation – Desktop 3D printers are often built out of a kit and are tuned by hand, which can produce inconsistencies in production.
- Not ideal for Mass Production – Though 3D printed parts are economical when it comes to lower production volumes and prototyping, it tends to reduce in value when the production requirement crosses more than 100 parts per day. Other processes such as injection molding and die casting provide higher throughput.
-
Pros
-
First layer adhesion problem – This problem refers to a condition where the first layer of the print does not stick to the bed.
- Check bed levelling – If the bed is not levelled appropriately then the first layer may not stick to the plate.
- Check bed temperature – Some materials require a heated bed to ensure that the print sticks to the bed.
- Set optimum print speed – The print speed can significantly affect the layer adhesion. Faster the speed, lower the bed adhesion.
- Adjust nozzle height – If the nozzle is too high from the bed then the deposited layer will not stick or even fall at the desired location.
- Use external adhesive agents – If layers are not sticking to the bed, then one solution to ensure proper layer adhesion is to use external adhesive agents like tape, glue or ABS slurry.
-
Nozzle failing to extrude material – This occurs because while the extruder is being heated the material sitting inside starts melting and some of the material starts dripping/oozing down from the nozzle. This causes a void in the nozzle and when the actual print starts, the nozzle does not extrude the material.
- Ensure priming of nozzle – start all your prints with a few layers of ‘Skirt’ which will help in maintain a regular flow of the material before it starts printing the actual model.
- Adjust nozzle height – if the nozzle is too close to the build plate, then the extruder may not be able to deposit the required amount of material on to the bed. So, it is important to set the nozzle height appropriately.
- Check for filament problems – Many times the filaments are not stored appropriately, and this can expose the material to ambient conditions which can deteriorate the material. Sometimes the filament absorbs so much moisture that it forms air bubbles. These air bubbles block the flow and again disrupt the extrusion flow.
-
Weak infill – The infill density and pattern play an important role in the strength of the parts. It also dictates the stability & shape of the model. So, it is important that the infill is carefully selected and used.
- Set optimum print speed – the infill serves many purposes, and it should be printed with as much precision as the other layers. So, the print speed should be adjusted and generally printed at low speeds. This can be easily resolved through a trial & error method.
- Check extrusion width – By printing the infill with larger extrusion width, the infill can be substantially stronger. But increasing the infill extrusion width will also increase the amount of material deposited and so if the model is small then the infill pattern may overlap. So, it should be tried only with bigger models.
- Use appropriate infill pattern – Some infill patterns are stronger than others while others are easy to remove. So, experimenting with the available infill pattern in the slicing software will also help in eliminating the problem of weak infill.
-
Stringing or Oozing – This can be prevented with adequate retraction method. Retraction is the backward movement of the filament to prevent excess oozing of the malted material. By carefully managing this parameter, oozing or stringing problems can be eliminated.
- Set ideal retraction speed – If the speed is too fast then the melted plastic may break away from the un-melted filament above and the whole purpose of retraction is lost. If the speed is slow, then it may not help in reducing the oozing.
- Set ideal retraction distance – The retraction distance will depend on the extrusion system, direct-drive, or Bowden-drive. The direct-drive extruders will work with small retraction distances (generally around 1-2mm) while the Bowden extruder system will require retraction distance of around 5-10mm. This distance will also depend on the type of material and the printer used, and so the distance will have to be carefully found out for optimum printing.
- Adjust heater temperature – If the temperature is too high then the viscosity of the material is lowered and the material drips even when the filament is retracted. A low temperature will stop the oozing but will affect the print quality.
- Avoid long free travels – By getting into the details of slicer settings the free movement of the nozzle can be controlled. These settings help in finding the shortest route to the next deposition point or the travel movements can be controlled to avoid crossing an open space altogether.
-
Warping – Warping is caused when the deposited material cools quickly. While cooling, the material contracts and this causes the ends to be lifted thereby causing warping. Warping also leads to cracks in the print.
- Adjust bed temperature – The main solution to eliminating the warping issue is it use a heated bed while printing with materials which undergo warping, namely ABS. The core idea is to keep the first layer heated and not let them cool quickly.
- Adjust fan speed – Use advanced slicer settings to switch off the fan completely or keep the fan speed to a minimum for the first few layers. The fan can be switched-on after those initial layers.
- Set optimum ambient temperature – It is advisable to use an enclosure while 3D printing. While an enclosed 3D printer may be costly but this added expense will help to avoid issues like warping, nozzle clogging, etc.
- Try new build plates – To increase the build adhesion between the layers and the build plate, new types of build surfaces and plates can be used.
- During a 3D printing process, specifically SLM method, the atmosphere that surrounds the powder used for printing can oxidize which alters its melting point and warps the printed part.
- The 3D printing process is like welding wherein the fusing takes place in inert atmosphere of argon or helium to ensure that oxygen does not contaminate the process. Even tiny amounts of oxygen can lead to change of color and physical properties of the part.
- One primary advantage of post-printing heat treatment is its de-tensioning effects. During the printing phase, materials can accumulate internal stresses and tensions, which compromise mechanical properties – weaknesses that heat treatment can reverse.
- It can be used to optimize the properties of printed products, adding extra features such as heat resistance or tensile strength. Vacuum heat treatment offers the best performance for post-printing heat treatment.
- Use of vacuum minimizes the degree of surface contamination detected following 3D printing, improving the physical performance of components. It also enables technicians to carry out accurate, easily repeatable corrosion tests on printed components. It can also have aesthetic benefits for printed parts.